There are truly only two things you need to build your own in-home golf simulator: high ceilings and an understanding spouse. Luckily for me, when my family and I moved into our new home in April 2017, I was able to secure the former after having married the latter four years prior.
From there, a relatively blank canvas, a young family and a golf addiction led to some interesting Google searches. By the time winter came to Cincinnati, Ohio later that year, I was determined to figure out a way to continue playing golf — or at least, a way to keep hitting golf balls — through the offseason.
With a typical mat and net setup as well as 12-foot garage ceilings, I had a place to hit balls. However, my vision for the space evolved and the price tag continued to climb.
After nagging my wife for weeks, I was able to come up with a loose budget that, I argued, could get a full-fledged hitting bay into our garage for a few hundred bucks.

A massive folder of bookmarked webpages of in-home hitting bay/simulator builds, materials and reviews filled my browser history. There was no turning back now — I would be hitting balls into some semblance of a screen before the first snowfall.
THE BUILD
I had decided I was going to use my side of our two-car garage for the hitting bay, which meant parking outside through a Cincinnati winter. Life’s all about sacrifices. I mapped out a 12′ x 12′ area on the back half of the garage that would serve as my homemade hitting bay.
I decided upon a conduit pipe-based build that mimicked some of the pre-packaged options out there, but working on a budget, dropping $500 in one fell swoop on the kit was a non-starter. Knowing my wife, I figured I could piece the build together, slowly and steadily dropping $50 or $75 here and there.

I opted to go with 1″ x 10′ EMT conduit pipe. This would be my frame. I bought 10 of those, a bunch of electrical tape (for aesthetic reasons that you’ll see in pictures below) and some fittings — four flat roof corner fittings for the screen side and two L- shaped fittings for the opening.
I wrapped the conduit in electrical tape, which gave it a more finished look, and began building out the frame.

This is when things started to get real.
I purchased a 10′ x 10′ net. Designed with a small-enough weave, like-minded golf sickos had reviewed it as the perfect option to get the job done as a MacGyver’d golf hitting net. I used wire ties to attach the net to the frame, leaving some give at the bottom.
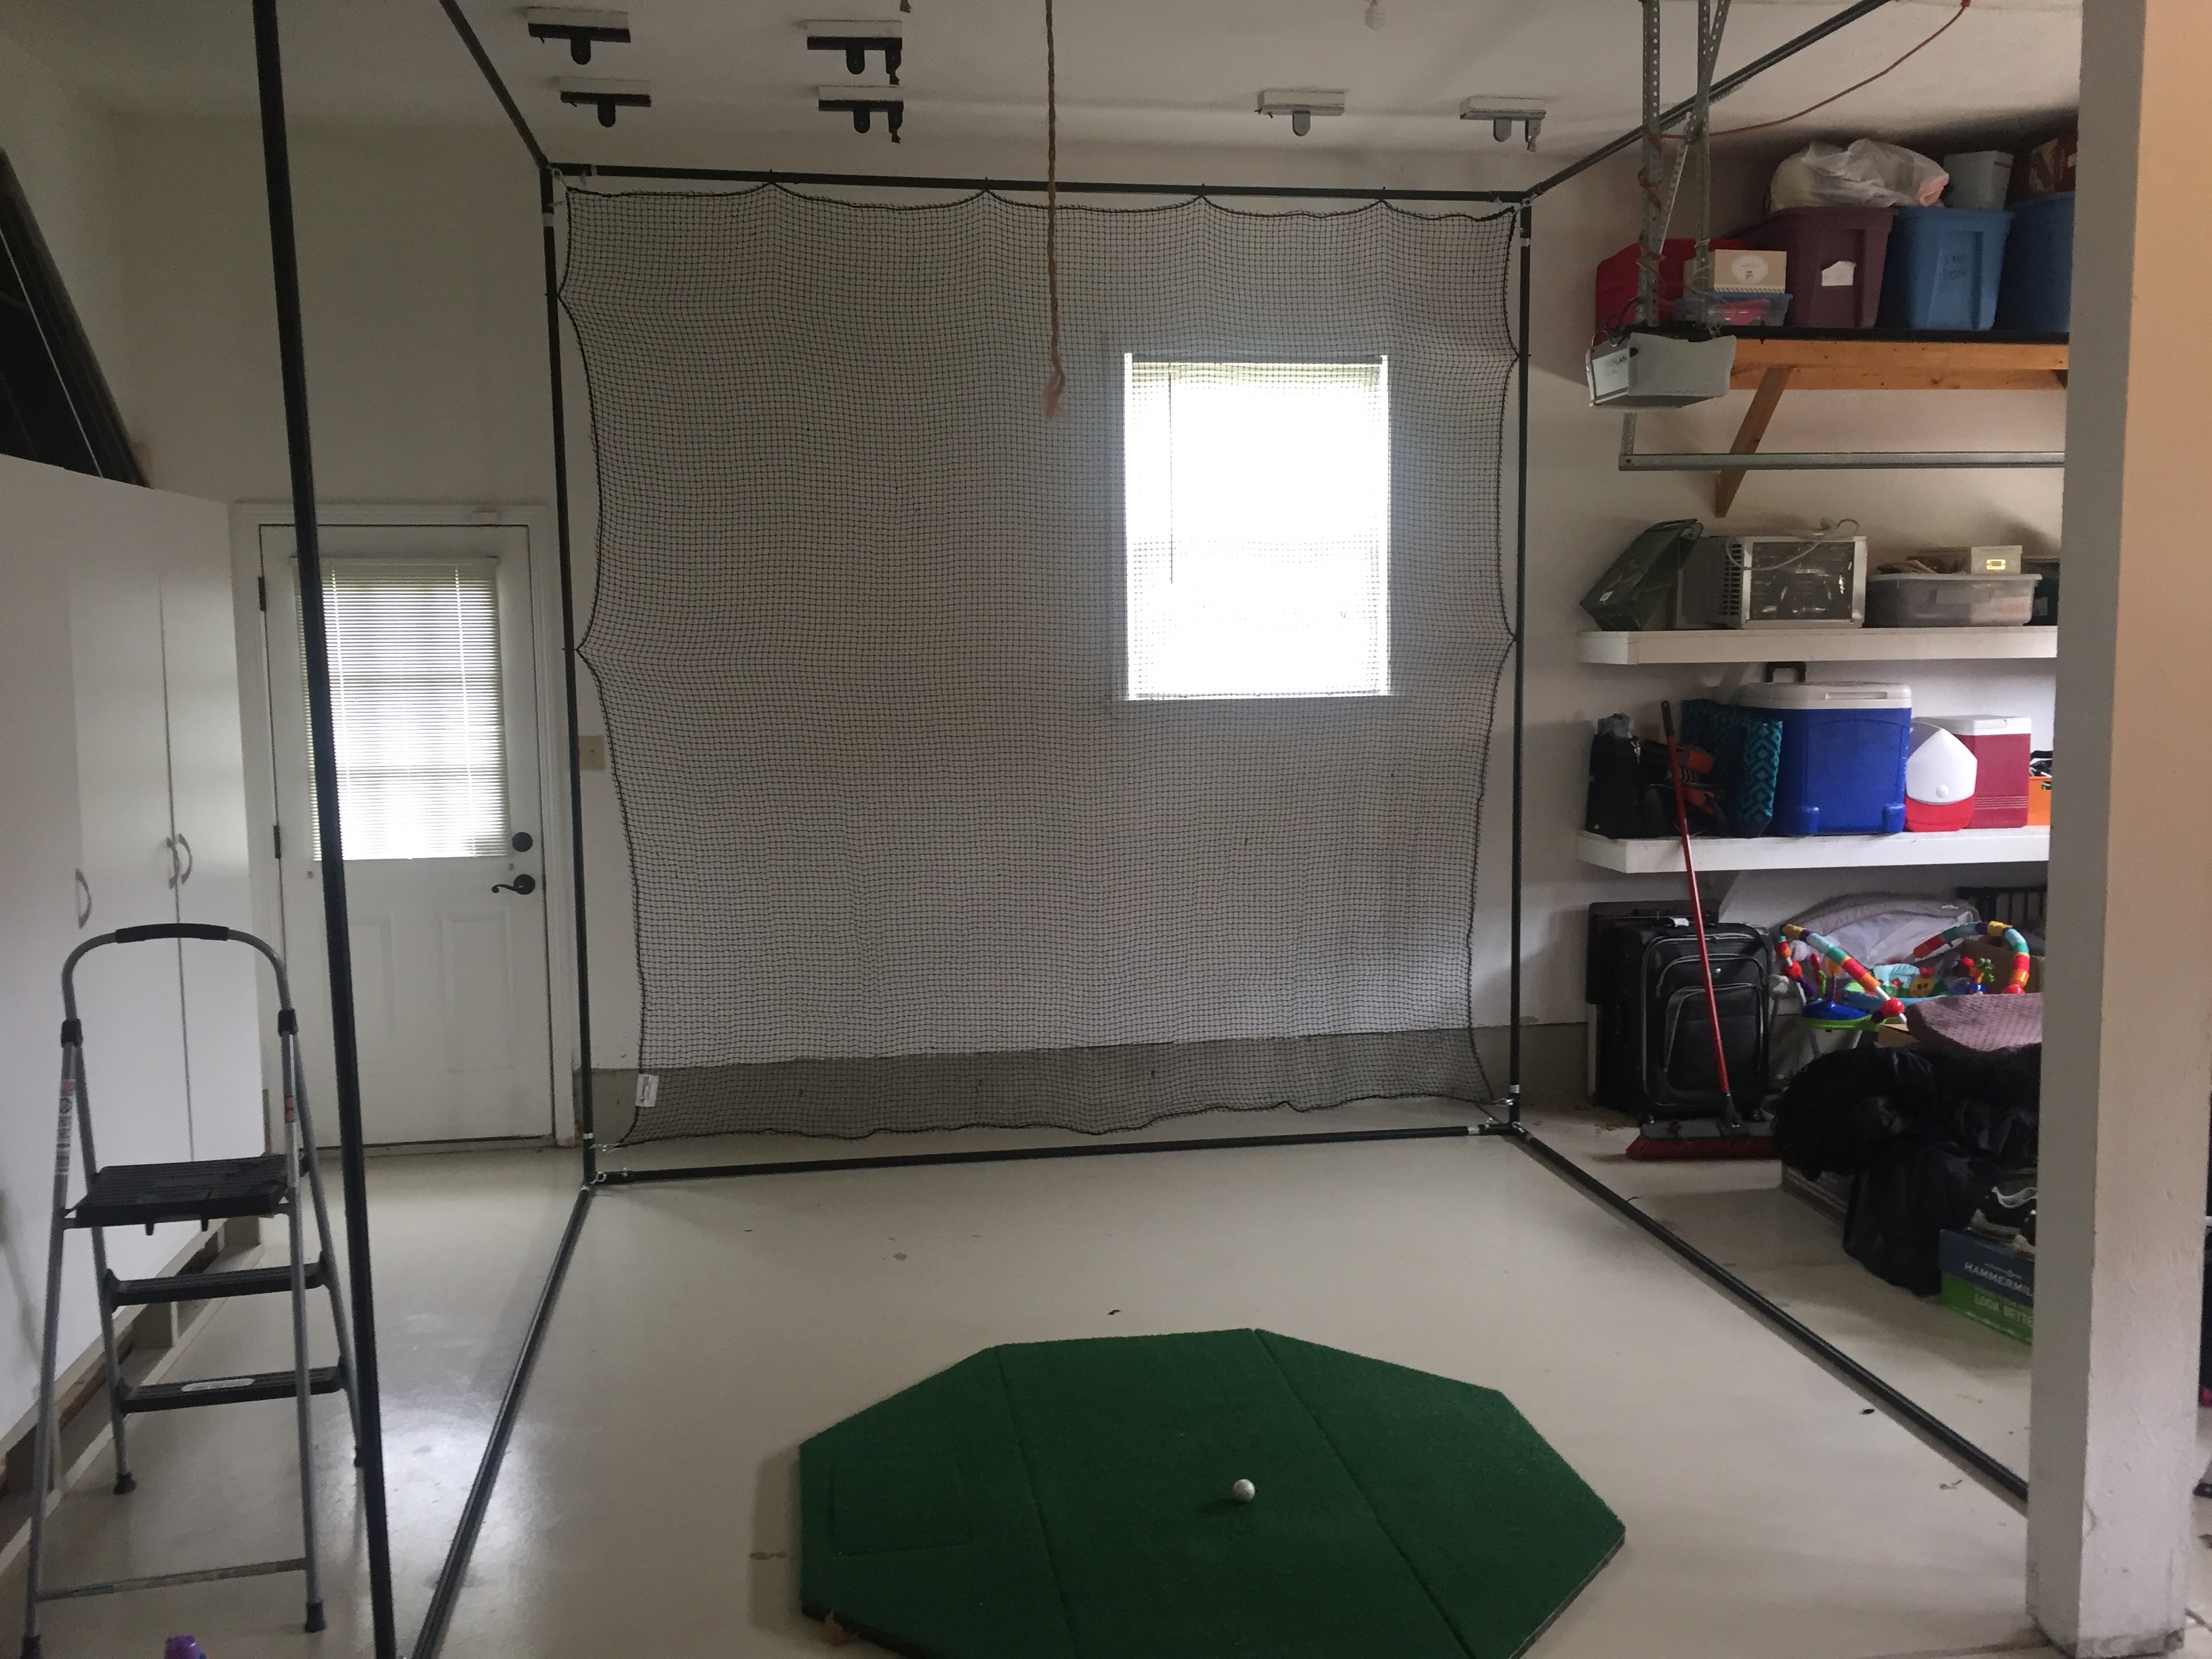
With hopes of hitting driver through wedge, I needed net reinforcements so that nice window you see there behind the frame wouldn’t be a casualty of improvement.
For this, I got a little creative. Blackout panels can be expensive, so I went on eBay and grabbed a couple of black photographer backdrops. I also bought a white backdrop to go in front of the net. These ran me roughly $10 apiece. To connect those to the conduit, I bought a few grommet kits and some ball bungees.
Sliding those onto the conduit like a shower curtain worked like a dream. I bought some of that synthetic grass carpet from Home Depot to dull the sound of bouncing golf balls on a concrete floor and soon enough, I had what looked like a full-scale hitting bay, even if it wasn’t operational yet.
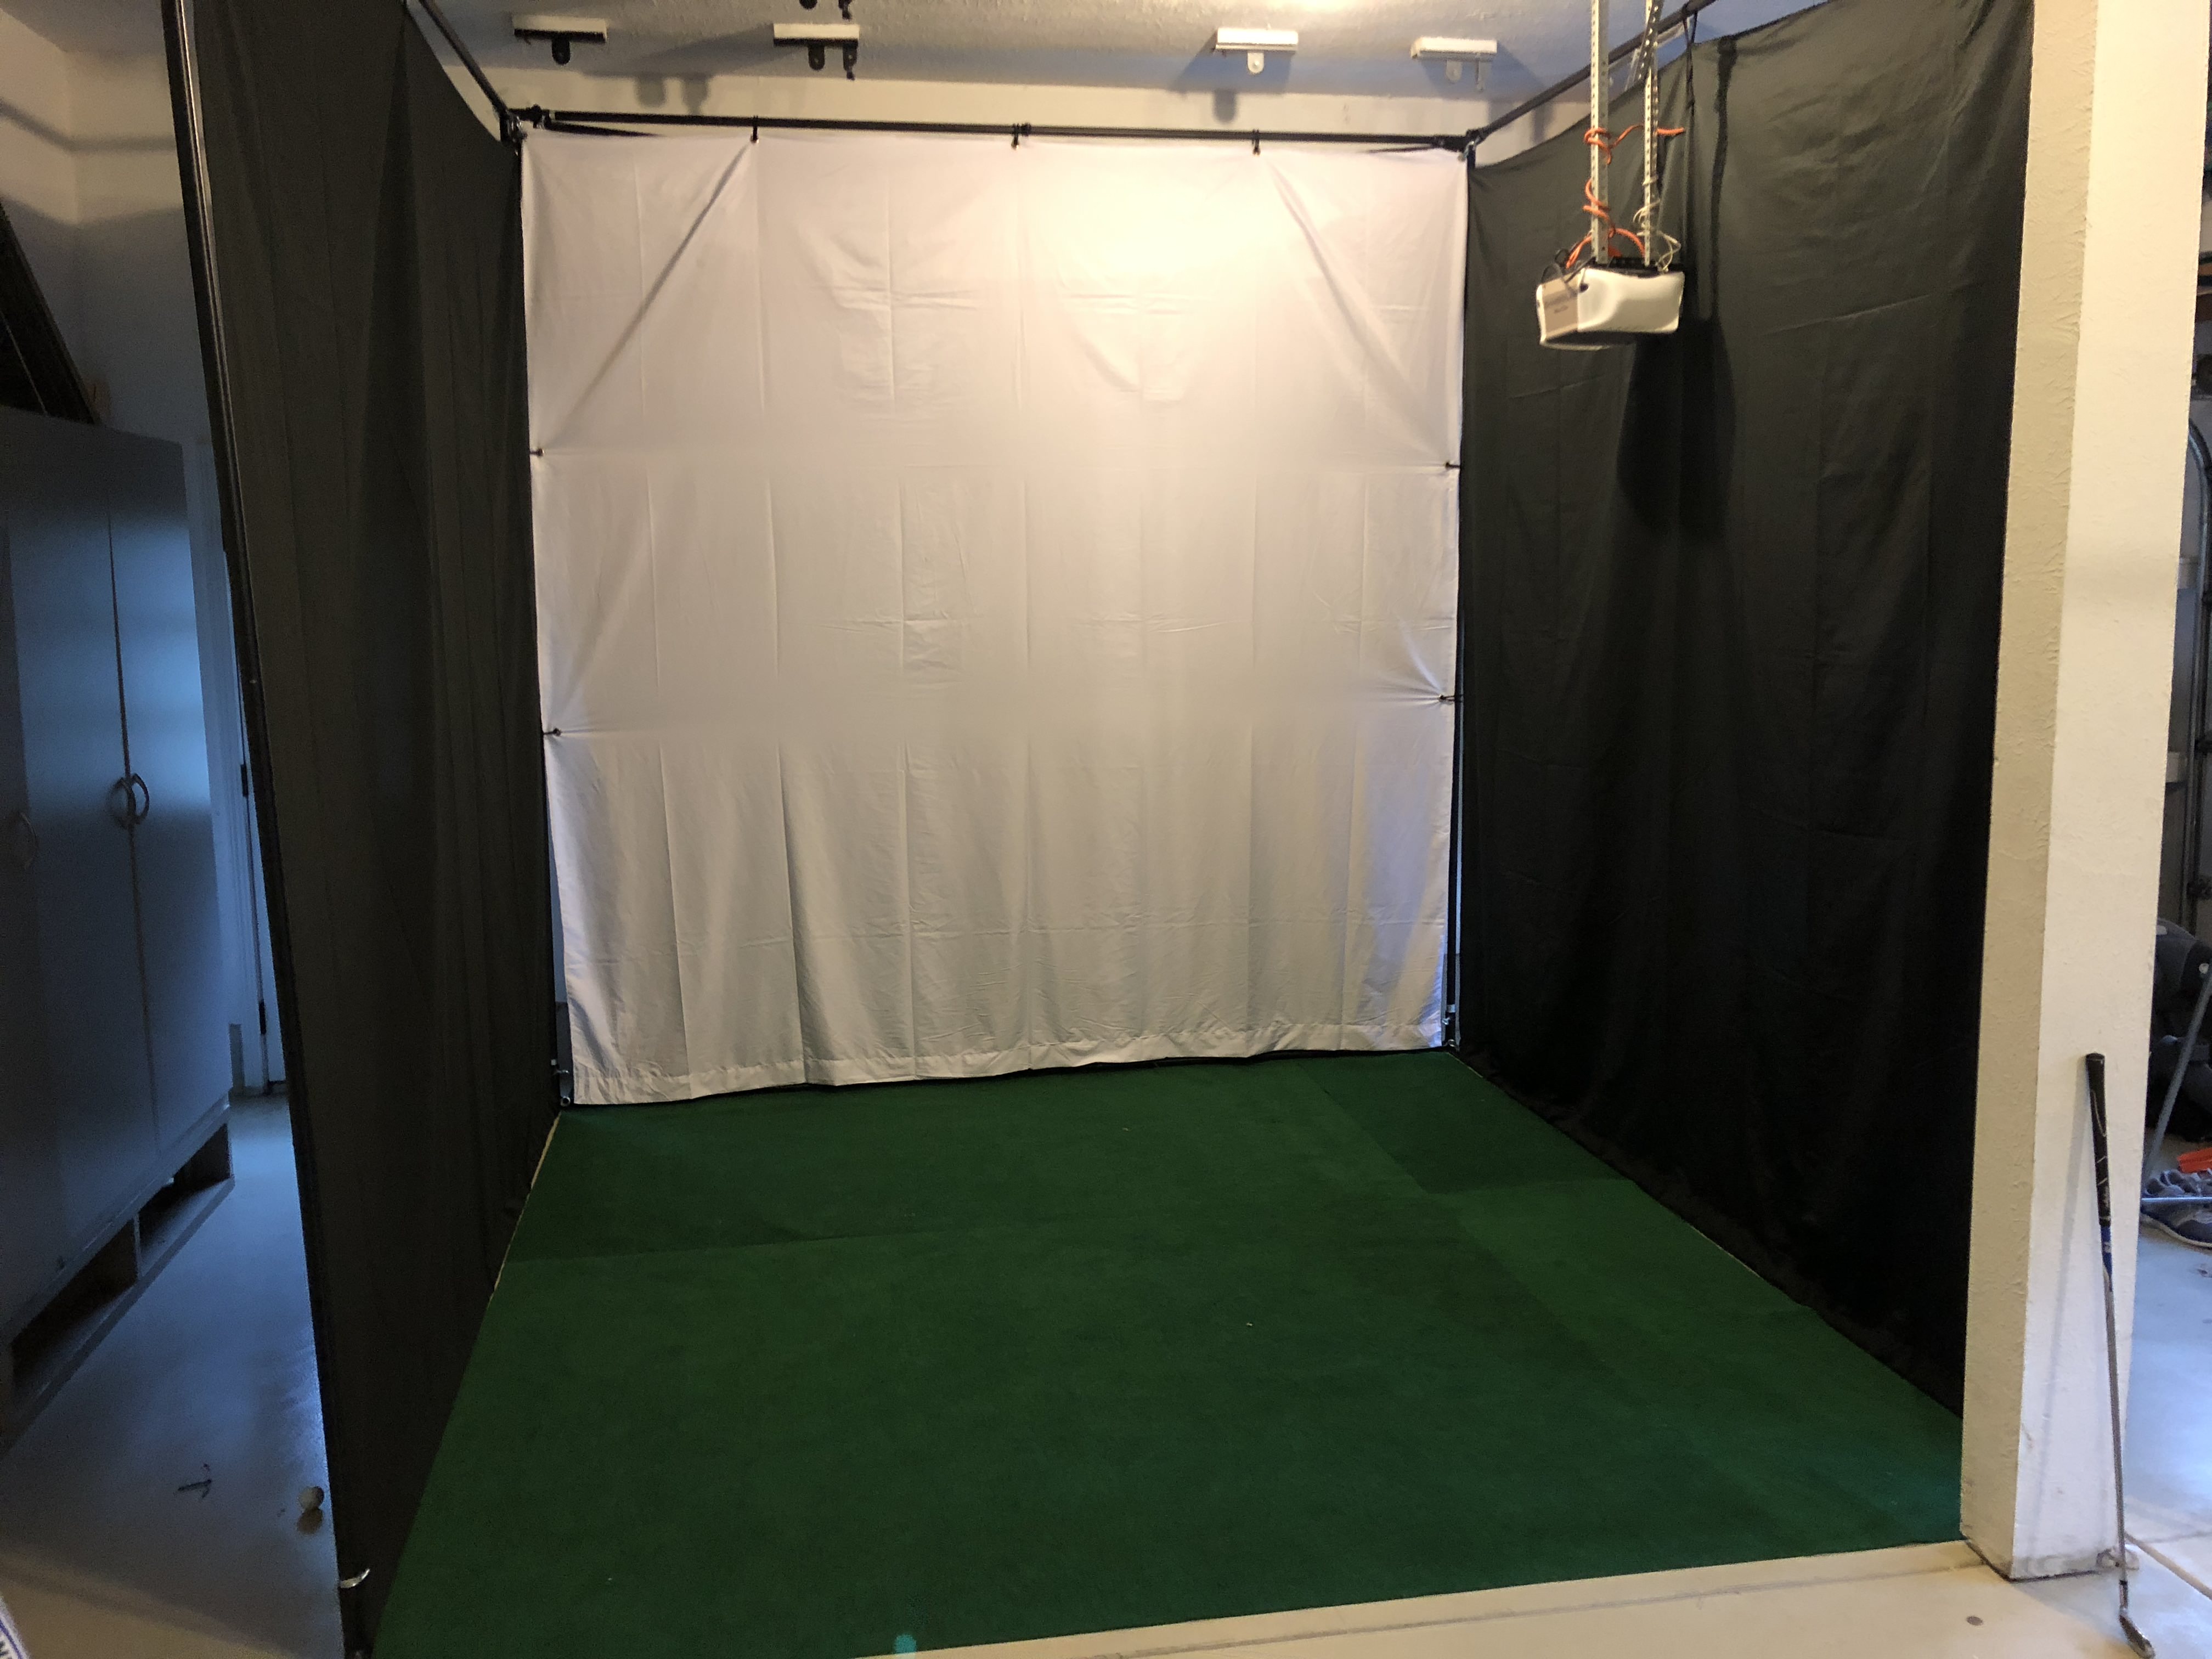
In doing more research, I came across a guy who used an IKEA comforter as his hitting screen, which got the job done for about $35. Now, I had a full-service hitting bay made up of a net, fronted by a photographer backdrop with a comforter out front all connected to the frame via ball bungees.
At that point, I was good to go.
All-in, the setup cost in the neighborhood of $365. With all your supplies in hand, it’s roughly eight hours of labor, but doing this as I went, it took roughly a week and a half or so to complete, most of which was spent waiting on deliveres.
THE COST
- Conduit pipe – $100
- Fittings – $35
- Net – $50
- Backdrops – $30
- Comforter – $35
- Carpet – $40
- Accessories (wire tires, tape, bungees, grommet kit, et al) – $75
- TOTAL: $365
THE POSTSCRIPT
If this is where you wanted to cap it, by all means, you’re already way ahead of the game — but my journey continued and this is where the understanding spouse mentioned previously is of incredible importance.
I had lucked into a hand-me-down OptiShot as word-of-mouth and audible eye-rolling permeated family and close friends during my build. That’s where the next portion of the adventure began. I needed more. I had basically built out a ready-to-go golf simulator bay without the simulator integration.
Next up was a refurbished projector, a computer hook-up (taken out of our home office) and some long HDMI wiring to make it all hum. This basically doubled the budget with a few clicks of the mouse (and that’s not even counting the OptiShot).
By the end of it, the price stayed south of $1,000 thanks to some previously-owned bigger ticket items (mat, computer, OptiShot), but over the course of the next three years, I’ve put more money into the endeavor.

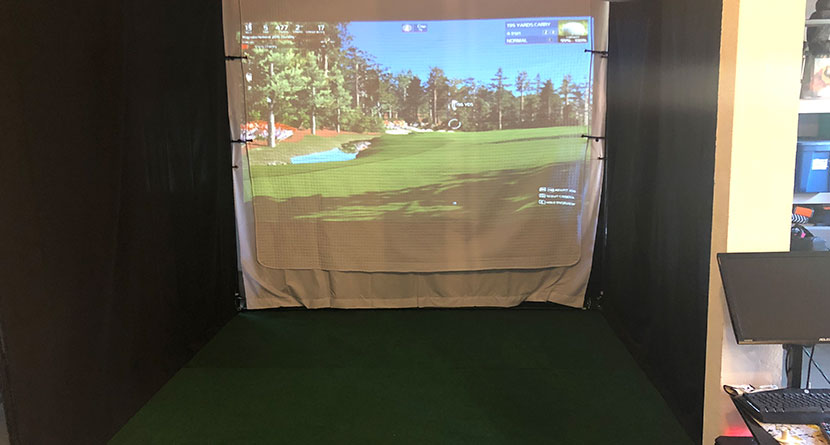
The comforter has been replaced by a full-fledged golf simulator impact screen ($200-300). The OptiShot was busted by an over-aggressive friend, and eventually replaced by a SkyTrak (understanding spouse, 30th birthday, Christmas present and financing FTW).
I’ve purchased a pair of County Club Elite hitting mats to replace my original mat. I’ve replaced the Home Depot carpet with kids playroom foam mats, which further dull the sound of bouncing balls. And I eventually opted for The Golf Club lifetime simulator package, which doesn’t require annual renewals, and allows me to play complete replica golf courses from the Old Course at St. Andrews to Augusta National.
Thanks to a little intuition and inspiration, as well as the ever-understanding wife, I have a little safe space out in my garage that can turn any mundane evening into a self-made Masters Sunday.


